Postman scripting — API TOKEN
This is just a quick tip if you’re using postman to test an API. Below I explain how to quickly add the API Token to each request.
If you haven’t used Postman, I’d suggest checking it out. It will make your life building APIs so much better! It has some great collaboration features, it’s perfect for individuals or any size team.
Simplify each step of building an API and streamline collaboration so you can create better APIs — faster.
To start, we need a request that responds with some data. This data could be needed for other requests in the API. Using a basic API example this is what the login response looks like after sending a username and a password:
"id": "5f26706f677f54182caa7090",
"username": "Users Name",
"email": "[email protected]",
"**accessToken**": "**eyJhbGciOiJIUzsInR5cCI6IkpXVCJ9.eyJhbGciOiJIUzsInR5cCI6IkpXVCJ9.-eyJhbGciOiJIUzsInR5cCI6IkpXVCJ9**"
Now, if we have a route that requires a token header, such as user details. We would need to copy-paste the access token for all requests that need it. That’s fine if you have a small API build/prototype. But when it gets bigger you can use Postman features to “autofill” that token header with just some simple JavaScript.
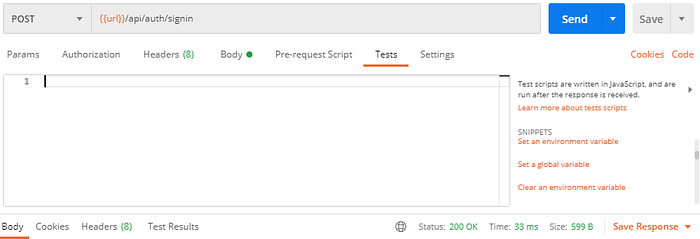
Open up the login request and click the “Tests” tab. This will allow you to add a script after the request is fired. You might notice a tab called “Pre-request Script”, as it says on the tin, runs JavaScript before the request is fired.

Here you can write any JavaScript that you like! There is some great example on the right side of the pane.
For our case, we just need to parse the response and set a variable. These can be either an environmental or global variable.
You can create and set variables by access the cog top right of the Workspace.
Learn more about setting up Postman environments here
Create an environment and then click on its title to change to another view. Here you can set the variable name and a (default) initial value. Otherwise, leave it blank and our script will fill in the current value.


That’s how to create an environment variable that is scoped to one area.
To make a global variable, go to the cog again and then you should see on the bottom of the popup “Globals”. Click that button and then create the variable in the same way. This, however, will be accessible from the entire workspace, not just the set environment such as “production” or “dev”.

On the Tests tab, you will need to add something like this:
const jsonData = JSON.parse(responseBody);if (jsonData && jsonData.accessToken) {
   pm.globals.set("apitoken", jsonData.accessToken);
   // OR
   pm.environment.set("apitoken", jsonData.accessToken);
}
First one will set the global variable and the second will set the current selected environment. If you want you can read more about Postman test scripts and dig deeper.
To conclude, we can now use this variable in most places by adding double curly brackets eg. {{apitoken}}. It will then keep it up to date each time to send the login request.

I hope this will help and make you like Postman even more.
Please let me know on any social media if this helps you. Thank you for reading!